.png?height=120&name=FinPro%20logo%20full%20color%20(1).png)
This article will guide you step-by-step through the process of creating a Peer Group.
Creating a Peer Group:
To create a new Peer Group, click on "Edit Peer Groups" and follow the steps below:
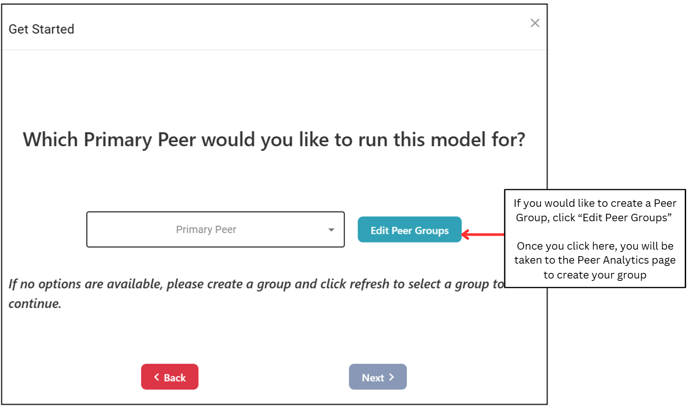
Clicking Edit Peer Groups will bring you to the Peer Analytics page. To create a group, click the "Create Group" button on the top left-hand side:
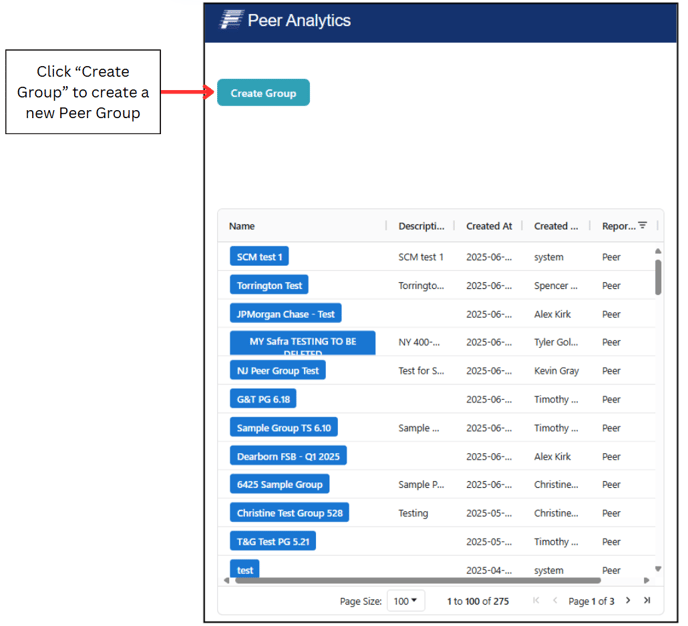
Clicking "Create Group" will generate a pop-up with the below advisory message:
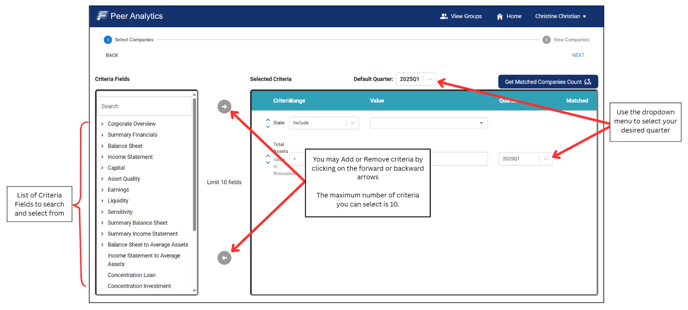
You may now begin selecting your desired criteria:
- The list of provided criteria to select from is housed under Criteria Fields.
- Use the forward and back arrows to add or remove criteria.
- State and Total Assets are set as defaults; however, you may remove them if you do not wish to include them in your group.
- Your selections will appear under Selected Criteria.
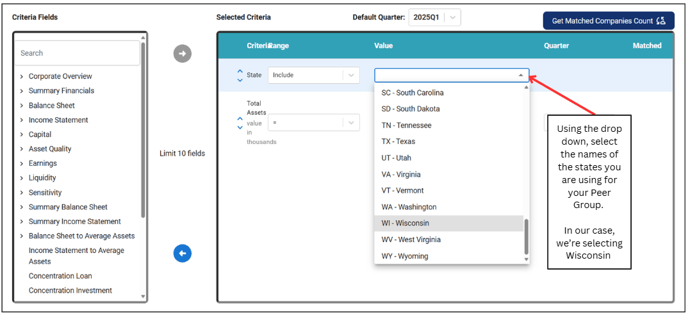
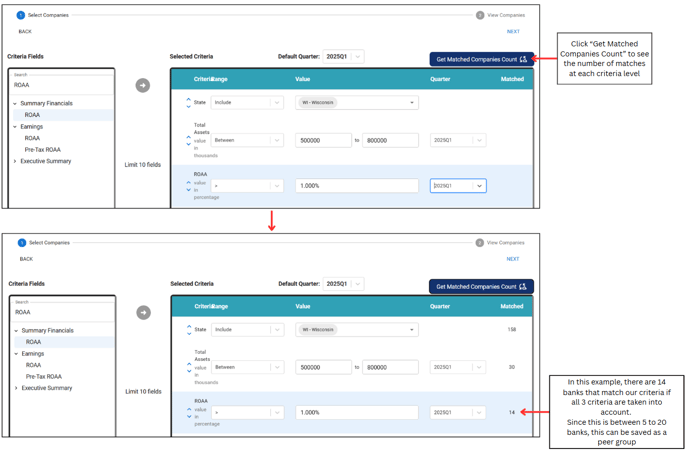
For our example, we are selecting the state of Wisconsin:
We are also selecting Total Assets between $500,000 and $800,000 per the Total Assets amount listed in the Institution Details:
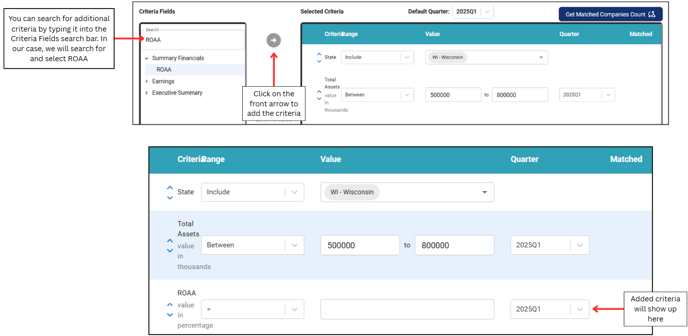
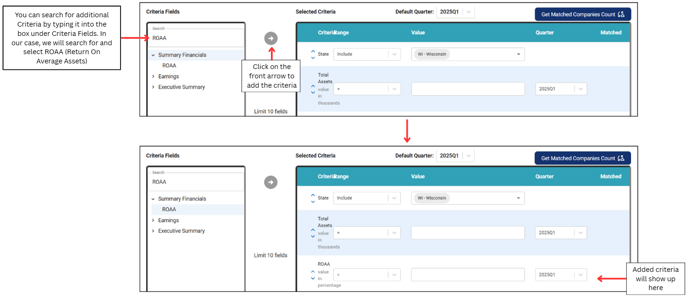
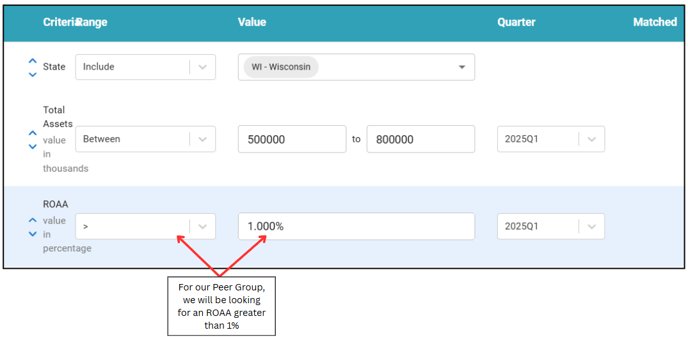
We will add an ROAA greater than 1%:
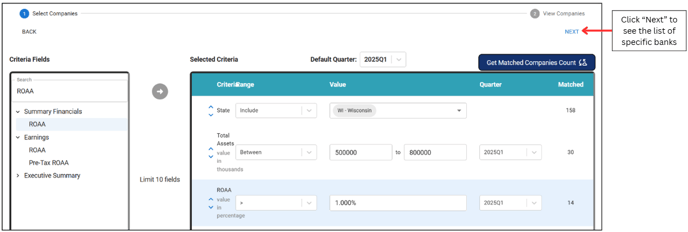
Once our selections are made, we will click "Get Matched Companies Count" to see the number of matches that populate.
- Please note, in order to create a Peer Group, the number of companies matched must be between 5 to 20.
- Since we have 14 banks that match our criteria, we can click "Next" and proceed with viewing the list of specific banks.
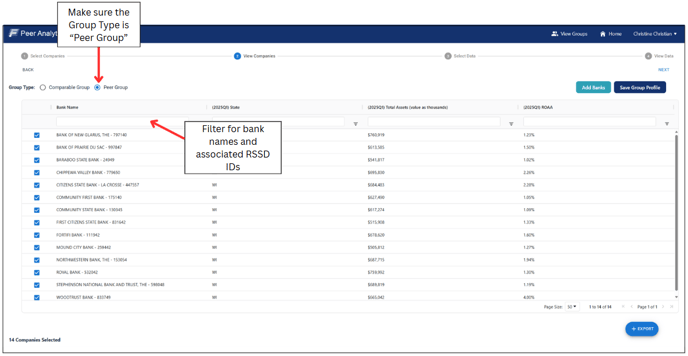
When viewing the banks listed, ensure your Group Type is set as Peer Group. You may also filter for specific bank names and their associated RSSDIDs under "Bank Name":
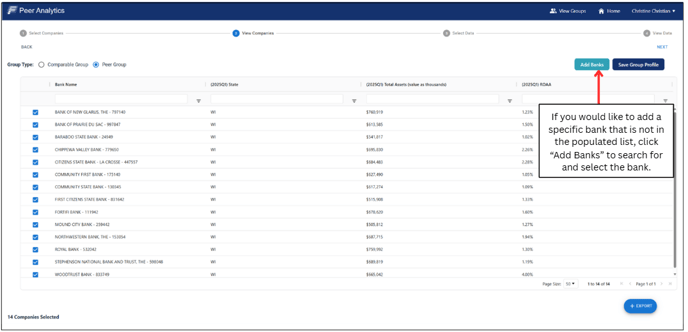
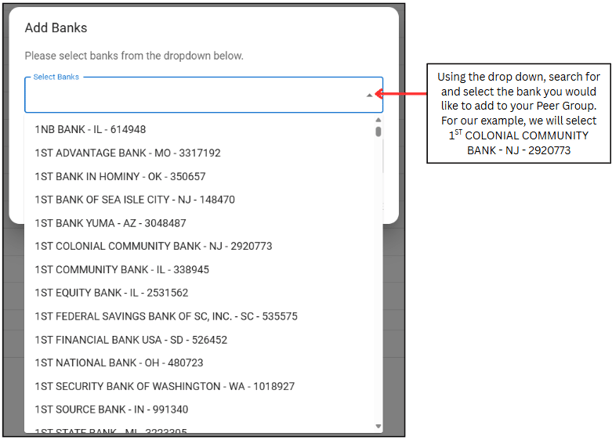
If you would like to add a bank that is not in the list, click "Add Banks":
- Please note you may only add banks if your list has less than 20 banks.
Using the drop down, search for and select the bank you would like to add to your Peer Group:
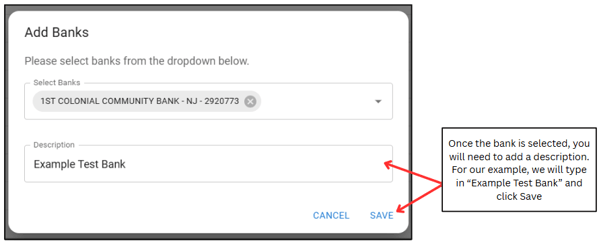
Once the bank of your choice is selected, enter a description of why you are adding the bank to the group and click "Save":
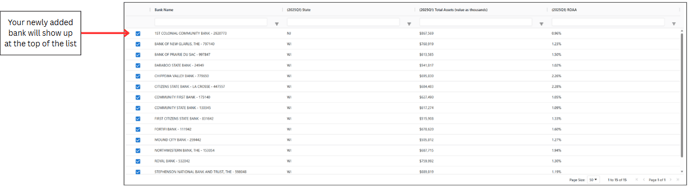
Your newly added bank will show up at the top of the list:
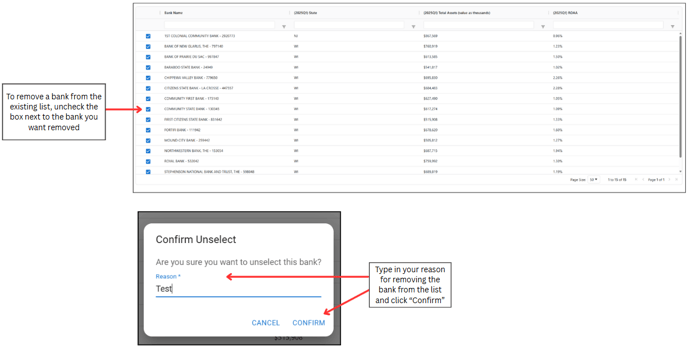
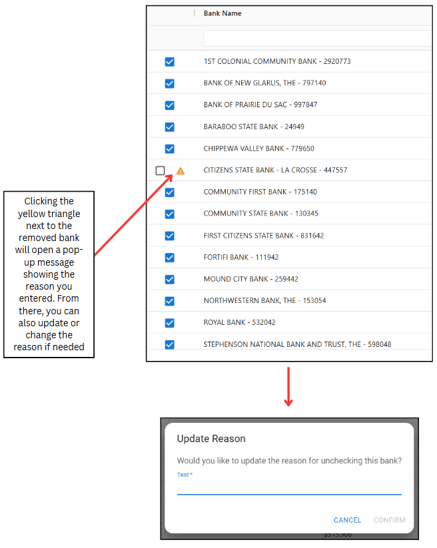
To remove a bank from the list, simply uncheck the box next to its name and enter a reason for the removal. This reason will be visible to all of the users in your tenant who view the Peer Group.
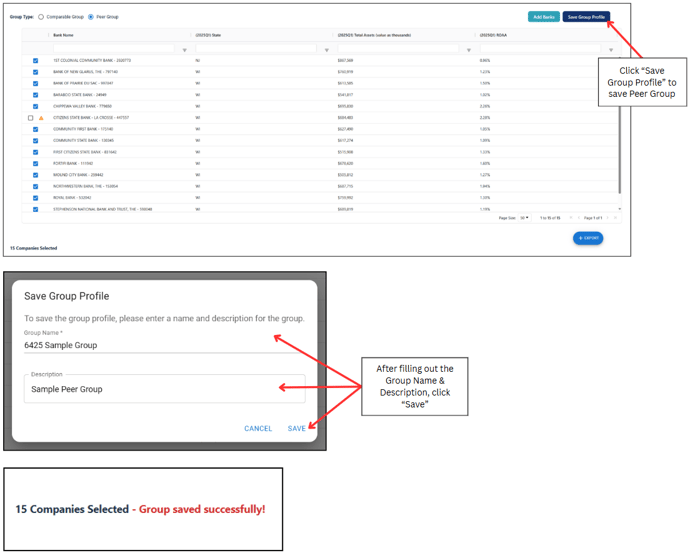
Once you are satisfied with the Peer Group criteria & details, click "Save Group to Profile". You will then be prompted to fill out a Group Name and Description prior to saving the group:
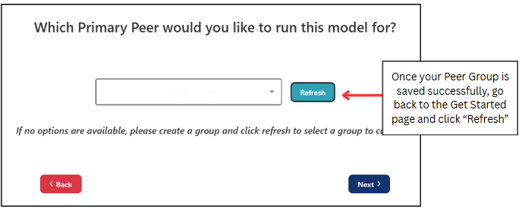
Once your group is successfully saved, go back to the Get Started Page and click the "Refresh" button under Primary Peer:
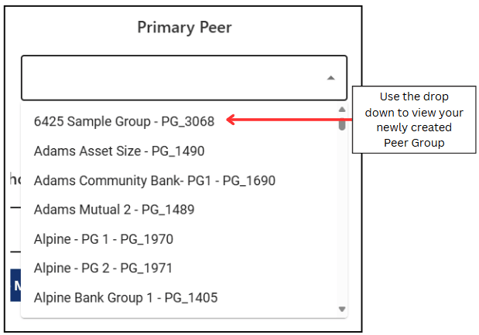
After clicking "Refresh", use the drop down to view your newly created Peer Group:
- Please note, you will only be able to view Peer Groups created within your tenant.
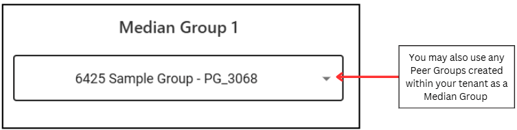
Peer Groups created within your tenant may also be used as a Median Group: